So you just had a tree removed in your property. What’s next? Do you have any idea about what to do with the available space that’s left behind after a tree removal process?
When you hire a tree removal service to have a dead or dying tree removed from your property, you’re typically left with an unsightly tree stump. Obviously, you can have the tree service remove the stump as well, but that usually entails an added cost.
If you don’t want to pay extra to have the tree stump removed, there are a few DIY tips you can try to improve the look of your garden and get rid of that tripping hazard that’s messing up the aesthetics of your otherwise lovely yard.
Stump Removal Techniques
There are a variety of DIY techniques and methods to effectively remove a tree stump without the aid of professional services. They are as follows:
Stump Removal Through Mechanical Means
For this particular method, you’re going to need a stump grinder, a chainsaw, a shovel or mattock, and safety gear like a pair of work gloves and protective goggles. Removing tree stumps using mechanical tools like chainsaws and grinders can be dangerous, so make sure to apply caution at all times when operating such heavy equipment.
Stump Removal Through Chemical Means
For this process, you’re going to use a chainsaw to remove as much of the stump as possible.
- You’ll then use a hand drill to make holes on the flat surface of the stump. The holes should be at least an inch wide, eight to 12 inches deep, and three to four inches apart.
- You may also want to drill additional holes on the side of the stump so that they meet with the other holes on the top, creating a 45° angle.
- After drilling, you then pour the chemical potassium nitrate into each of the holes and fill them with water.
All you have to do is wait for the stump to rot and become spongy. This process usually takes four to six weeks to complete. After that, the stump is fairly easy to remove from the ground.
Stump Removal Through Burning
This method is probably one of the most common stump removal techniques.
- Using fuel oil or kerosene, you can simply burn the stump until it is reduced to a pile of charred wood, which can then be easily removed with an ax or a shovel.
What To Do After The Tree Stump Has Been Removed
Here are a few things you can do to rehabilitate the area where the tree stump used to be and prepare it for replanting.
1. Remove Wood Chips And Debris From The Area.
After you remove the tree stump, that space where the stump used to be is going to look horrible in relation to the rest of your yard, like the gopher from Caddyshack did a number on it. So, what you need to do is clear away the debris that’s left by the stump.
Depending on the removal process you employed, there’s going to be wood chips, roots, and even small branches left in that space. You need to remove these in order to prepare the soil for replanting.
2. Add And Prepare The Soil.
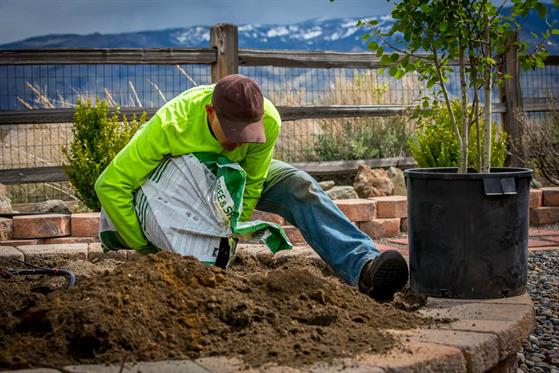
Once the area is clean and free of any debris, you can start adding the soil and prepare it for the seeding process. Make sure to cover the hole with the appropriate amount of soil to even it out with the rest of the yard.
3. Prepare The Area For Replanting.
If you’re going to plant another tree in that same area, you need to make sure that the soil is well nourished and capable of supporting a growing tree. Keep in mind that a developing tree is going to need a lot of nutrients in order to grow.

On the other hand, if you wish to cover the void with grass, then you should prepare the soil for seeding. A tip: Make sure that the seed you’re going to place in that spot is the same variety as the rest of your yard.
You may want to ask for professional help as to the proper techniques and methods on how to properly prepare the soil for replanting purposes.


